Thursday, July 15, 2010

Hodge Podge

This is a picture of some of the savory food I've made in the last year. Though it is certainly only a sampling, I thought it would be fun to see these in a collage form.


Seen above:
-tomatoes from my garden (oh so proud of this picture!)
-vegetable stir fry (i had a vegetarian kick for about 6 months)
-chili-lime salmon with spicy sweet potatoes and avocado salsa salad
-chicken enchiladas (as seen in a previous post)
-homemade pizza
-seared tuna
-seared scallops with orange beurre blanc
-baby greens with bleu cheese, toasted walnuts, blackberries, and blackberry vinaigrette
-valentine's dinner: short ribs, asiago polenta, red wine jus, squash "spaghetti", caprese salad, champagne
-summer meal: potatoes on the grill, citrus-dijon marinated grilled chicken, grilled zucchini and summer squash, fried green tomatoes with remoulade, miller lite
-vegetable frittata
-enchiladas

To catch up quickly, I will be doing a couple more of these posts: one for desserts, and one for parties. Loving compiling my food pictures!

Wednesday, July 14, 2010

So, I’m back! And it only took me 10 months to post again. Sad, huh? Anyway, here is a snapshot into the past year – what I’ve been doing, why I’ve been MIA, and all that. Also, my goals for this blog.
Here goes…

1. Culinary School: I finished my Culinary Arts Degree from Johnson and Wales University at the end of May. I learned so much about cooking, the food world, how to operate a business in the culinary industry, recipe editing, etc etc, and I am so grateful for this experience! I’ll do a post devoted to this sometime soon.
2. Work: During school I worked at La-tea-da’s catering in Charlotte. I was the Pastry Cook, and also filled in where needed with other cooking. I helped set up and work events, such as corporate affairs, weddings, and so on.
3. Work 2: I had the opportunity to participate in a co-op (a paid internship) for Compass Group North America, doing testing, research, and development for a very large corporate foodservice company.
4. Church: Todd and I have become a part of Elevation Church, and have been so blessed by it. I volunteer, and we also lead a community group (small group/Bible study). I now have the privilege of leading the Event Team for church, and it is a blast! You should check it out:
http://www.elevationchurch.org/
5. New House: We have done a lot to our new house, and it often became the occupier of our free time.
6. Trying to be a better Wife: This is still a work in progress, but I have really begun to understand the importance of my role in this marriage. My husband is wonderful, and I want to serve him and be the best partner that I can!

Goals:
1. Post more on this blog.
2. Become better at food photography.
3. Cook as much as possible and share the recipes.
4. Help people with event planning and catering – build a small business of this.
5. Re-design the blog.

Looking forward to it! Pictures and recipes to come!

Sunday, September 6, 2009

Rachel Zoe-Inspired

(If you are confused by the reference, you need to watch Bravo now, because you are most certainly missing out on some fabulous, even if it does subtract from your intelligence, television)

So since you have had your Bravo tutorial, here we go….This recipe is simply “Bananas!” I cannot take much credit for this, because it is stolen from Cooking Light, but I do believe that I picked a keeper. There are only few food items that I dislike, and unfortunately, plain/raw bananas are one of them. Believe me, I have tried to enjoy them! But, I DO love a great dessert or carb-filled treat with bananas. Typically I choose to eat produce the natural, healthy way, but not in the case of bananas. Anyway, here is great banana bread recipe that is much lower in fat and sugar!

Tip: This makes a great pre-workout snack. I made a “sandwich” for Todd with this as the base, some almond butter, and a little honey before we took Kenan out for some exercise!


Tip 2: Make sure your bananas are extra ripe. I used bananas that were too ripe to eat plain, so this is perfect for bananas that would typically be wasted.
Classic Banana Bread

2 cups all-purpose flour
3/4 teaspoon baking soda
1/2 teaspoon salt
1 cup sugar
1/4 cup butter, softened
2 large eggs
3 mashed ripe bananas
1/3 cup plain low-fat yogurt
1 teaspoon vanilla extract
Cooking spray- I use Pam Baking spray - it has flour in it, and everything I've baked with it comes out of the pan smoothly.

Preheat oven to 350°.

Lightly spoon flour into dry measuring cups; level with a knife. Combine the flour, baking soda, and salt, stirring with a whisk.

Place sugar and butter in a large bowl, and beat with a mixer at medium speed until well blended. Add the eggs, 1 at a time, beating well after each addition. Add banana, yogurt, and vanilla; beat until blended. Add flour mixture; beat at low speed just until moist.

Spoon batter into an 8 1/2 x 4 1/2-inch loaf pan coated with cooking spray. Bake at 350° for 1 hour or until a wooden pick inserted in center comes out clean. Cool 10 minutes in pan on a wire rack; remove from pan. Cool completely on wire rack.

Yield: 1 loaf, 14 servings (serving size: 1 slice)
CALORIES 187 (21% from fat); FAT 4.3g (sat 2.4g,mono 1.2g,poly 0.3g); IRON 1mg; CHOLESTEROL 40mg; CALCIUM 20mg; CARBOHYDRATE 34.4g; SODIUM 198mg; PROTEIN 3.3g; FIBER 1.1g

Cooking Light, SEPTEMBER 2003

Thursday, September 3, 2009

Island-Inspired Mahi Mahi and a New Version of Spinach Salad

Not my prettiest meal, and ignore the fact that the plate needed to be wiped down on the edge, but it was delish!

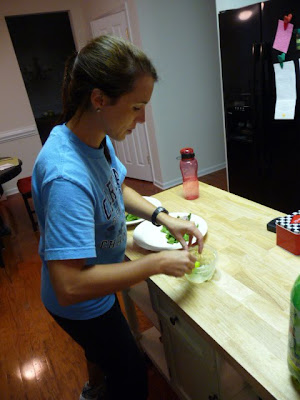
Plating dinner. Please excuse my work out wear and our bare kitchen-work in progress.
Delish Note: In a more professional atmosphere, I would certainly wear gloves.

This meal is right up my alley…simple, yet healthy with Asian and “island” accents. Todd and I love spinach, and have found many ways to incorporate it into our dinners. I have made multiple versions of spinach salad, and this is one of my new favorites! Spinach is considered a Superfood, because it is low in calories, but very rich in nutrients. Onions are also healthy – they contain flavanols, a type of antioxidant. The sesame oil has some fat, but it is a healthier fat, and this recipe contains a minimal amount. Fish is also something that we eat often because it is lean and low in calories and saturated fat, compared with other proteins. Broiling food is super-quick, and super-easy – just keep a close eye on the oven!

Spinach Salad with Broiled Red Onion Rings and Sesame-Ginger Vinaigrette


½ large red onion, cut crosswise into (1/4-inch-thick) rings
1 teaspoon sesame oil, divided
2 ½ teaspoons fresh lemon juice
1 ½ teaspoons low-sodium soy sauce
1 ½ teaspoons honey
¼ teaspoon powdered ginger
2 teaspoons sesame seeds, toasted
4 cups baby spinach leaves (about 4 ounces)
¼ teaspoon freshly ground black pepper
Dash salt, optional

Preheat the broiler.

Arrange onion on a sheet pan or broiler pan covered with aluminum foil, and sprayed with cooking spray. Brush onion with ½ teaspoon sesame oil. Broil onions between 6-9 minutes, or until browned and tender on an oven rack set a couple of inches below the heat.


Combine remaining ½ teaspoon oil, lemon juice, soy sauce, ginger, and honey in a small bowl, stirring with a whisk.

Place spinach in a large bowl and toss gently with dressing. Plate the spinach, and then top with onions. Sprinkle with sesame seeds.

(I also served this with a broiled lemon slice for some extra color, but this is completely optional)
CALORIES 50; FAT 2g IRON 2mg; CHOLESTEROL 0.0mg; CALCIUM 53mg; CARBOHYDRATE 8.1g; PROTEIN 1.7g; FIBER 2g

(The original recipe of this was from Cooking Light, but I changed it some by altering the dressing, broiling the onions instead of grilling them – but grilling would be really nice, also. I also changed the salt. When I made it, I eliminated the salt, but that is up to you!)

Broiled Mahi Mahi with Ginger-Lime Butter
2 tablespoons butter, softened
1 ½ tablespoons cilantro, chopped
1 tablespoon jalapeƱo pepper, seeded and minced
1 ½ teaspoon lime rind, grated
½ teaspoon powdered ginger
¼ teaspoon salt
3 (5-ounce) mahi mahi fillets, skin removed
½ teaspoon black pepper
½ teaspoon chili powder
Cooking spray
Lime wedges (optional)

Combine first 5 ingredients in a bowl. Cover and chill.

Preheat the broiler.

Sprinkle both sides of fish with salt and black pepper. Cover a jelly roll pan with aluminum foil and coat with cooking spray. Add fish to pan; broil 5-8 minutes or until fish flakes easily when tested with a fork or until desired degree of doneness.

Place the filets on plates, and top with 1-2 teaspoons of the butter mixture while the fish is still warm.

Serve with lime wedges, if desired.

CALORIES 200; FAT 6.5g CARBOHYDRATE 0.2g; PROTEIN 34g

(This idea also came from Cooking Light, but I made some changes – go figure! I used Mahi Mahi instead of Red Snapper, but many types of fish would work. I have made this with salmon and tilapia, also. I think it would be great with snapper, shrimp, or even chicken! [NOTE: If you use chicken, marinate it or season it earlier in the day with ginger, orange juice, chili powder, white wine, black pepper] I reduced the salt, added chili powder (for color and smokiness)

Enjoy!

Tuesday, September 1, 2009

Roots

Back where I come from
Where I’ll be when it’s said and done
I’m proud as anyone
Back where I come from…


Kenny has been playing in my mind lately for a few reasons. First, I’m back in full-fledged Carolina mode since we’ve moved back to Charlotte. I’ve gotten to see all of my family, which is wonderful. I’ve seen my cousins multiple times, my parents and brother, plus college friends, etc etc – fabulous! They all have my heart and I treasure the time with all of them. I’ve been to Chapel Hill multiple times, and Carolina blue memories come flooding back. I’m back to sweet tea, Southern accents, manners, and preppy clothes, and I love it.

Disclaimer – though this is all true, I truly do miss my Tampa friends, and our weekend outings, coffee breaks, beach trips, and barbecues.

I wanted to write this to honor my roots, and in particular, one of my main influences on my culinary skills and mindset. Southern food is notorious throughout the country, and I have had the ultimate privilege of being taught some of the basics and traditions by my Granny, a wonderful Southern cook and baker. Her specialties are endless as everything she cooks is delicious, but here are some of her notorious dishes: Buttermilk Fried Chicken, Chicken Pastry, Brunswick Stew, Waldorf Salad, Cherry Pie, and the absolute best and tastiest dessert ever in the whole wide world – no exaggeration: her 7-layer chocolate cake. Yes these are dishes that any great Southern matriarch serves, and no, they do not seem super special on paper, but with her touch and love put into these dishes, they are masterpieces. I always respected her gift and willingness to serve through her cooking.

I’m writing this post to honor my Granny, because she has been going through a rough time lately. She has Alzheimer’s, and it has really been rough on her lately. I have seen my family experience multiple types of disease, but this seems to be the worst. It takes over your mind, which affects your entire life. Granny is still beautiful, funny, and wonderful, but this disease has ripped away her independence and work ethic. She can no longer cook like she used to, but I am so grateful for her teaching my mom and I her kitchen secrets throughout the years.

She ALWAYS made her 7-layer chocolate cake for me (which is quite tedious, by the way) when we had family get-togethers. Even if there were 30 people there, the cake was made especially for me. She taught me how to roll out pastry dough from scratch for our family’s style of chicken pastry (not a simple method, either). I don’t know if she will ever know how much all of this has meant to me. I learned the true meanings of Southern food, from scratch, and homemade from her. I hope that I can make her understand just how much all of this has meant to me, and how much I love her for being such a magnificent woman and my one and only Granny!

Monday, August 24, 2009

Asian-Inspired Fresh Catch

My attempt at staying organized and saving money involves frequently checking the Harris Teeter Weekly Ad. Todd and I love to eat fish and produce, and I do my best to buy what is on sale, because that typically means that it is in season and/or caught fresh. Last week at the HT, wild caught yellowfin tuna steaks were on sale, so of course I had a meal that revolved around them. I found this tuna recipe online, and it is one from Bon Appetit. The cucumber salad is from Gourmet. I did, of course, make some adjustments.
Menu: Wasabi-Soy Marinated Seared Tuna
Sesame Green Beans
Asian Cucumber Ribbon Salad


Wasabi-Soy Marinated Seared Tuna
Yield: Makes 6 servings

1/4 cup reduced-sodium soy sauce
1 teaspoon wasabi powder
(look for this in the ethnic food aisle at the grocery store)
1/4 teaspoon garlic powder
1 t. toasted sesame seeds
4 6-ounce tuna steaks (each about 3/4 inch thick)
1 pound green beans, trimmed
1 tablespoon sesame oil
1 T. (packed) brown sugar
(optional – I left this out, and was still quite pleased. The original recipe called for 1/4
cup brown sugar, which I think would be much too sweet)

Boil a pot of water, and blanch green beans for 3-4 minutes, or until crisp-tender. Drain well, and put into ice water to shock them and stop the cooking process. Once cooled, drain and set aside.

Mix soy sauce, wasabi powder, toasted sesame seeds and garlic powder in 8x8x2-inch glass dish. Add tuna; turn several times to coat, and let marinate for 15 minutes.

Heat sesame oil in heavy large skillet over medium-high heat. Remove tuna from marinade; reserve marinade. Sprinkle tuna on all sides with ground black pepper. Add tuna to skillet and sear on each side, about 2 minutes each, depending on the temperature you desire – this time will keep it quite rare, but it can be cooked more if you desire your tuna fully cooked. Transfer tuna to cutting board and keep warm with aluminum foil.

Add green beans, sugar and reserved marinade to skillet. Cook until sauce is reduced enough to coat beans, stirring occasionally, about 3-4 minutes.

(Look for wasabi powder and sesame oil in the Asian foods section of the supermarket. )

Asian Cucumber Ribbon Salad
Yield: Makes 4 servings

1/4 cup rice vinegar
1/2 teaspoon sugar
1 teaspoon reduced-sodium soy sauce
1/2 teaspoon sesame oil
1 ½ cucumbers, halved crosswise (could also use English cucumbers)
½ red onion, sliced very thin

Bring vinegar and sugar to a simmer, stirring until sugar is dissolved, then cool to room temperature. Stir in soy sauce and sesame oil.

Cut cucumber lengthwise into 1/8-inch-thick ribbons. (A mandolin would be great for this type of cut, but since most people do not own them, a sharp chef’s knife works well, also). Toss cucumber and onion with dressing and let stand 5 minutes before serving.

*Do not let dressed cucumber salad stand more than 20 minutes before serving, or it will become soggy.

Assembly:
Cut the tuna into 2 pieces, or into strips. This shows the inside of the tuna, and is more representative of how seared tuna is typically served. Using tongs, place beans on the plate, all facing the same direction. Place pieces of tuna on top, and garnish with brunoise cucumber. Place the cucumber ribbon salad beside the tuna on the plate, and garnish with sesame seeds.
Review:
I did not have my skillet quite hot enough when I first put my tuna down. Next time I would let the oil be warmer, and sear it more quickly so that it would be even more rare inside. I am also going to try the cucumber salad dressing with Splenda instead of sugar, and skip the boiling step.
Health Benefits:
The sodium in this meal is minimal, as is the sugar, particularly because starch is absent from the menu. The green beans are cooked in a way that preserves most of the vegetable’s nutrients. The tuna is a wonderful protein to choose, and especially in this case, because it was wild-caught. This serving size of tuna contains around 175 calories, only 1.5 g. fat, and around 35 g protein!

Sunday, August 23, 2009

Oh My Strawberry Goodness

Strawberry Cupcakes with Vanilla Buttercream


I made these pink and green to celebrate one of my best girlfriend's birthday

Strawberry Cupcakes

1 box white cake mix (I always Duncan Hines)
3 T. all purpose flour
1 (3 oz.) box sugar-free strawberry jello
1 c. canola oil
½ c. milk
4 large eggs
½ c. crushed strawberries – chop these in a mini food processor until almost a puree

Preheat the oven to 350° and line a muffin pan with cupcake liners.

Mix cake mix, flour, and jello. Add the oil, milk, eggs, and strawberries, mixing at low speed until all of the ingredients are incorporated. Beat the batter for 3 more minutes on medium speed.

Pour the batter into muffin pans so that they are about half full.

Bake at 350° for 18-23 minutes, or until the tops are springy to the touch.

Vanilla Buttercream
3 sticks unsalted butter, softened
3 T. milk, cold
3 t. vanilla extract
6-7 c. powdered sugar

Using a mixer (I use my stand mixer), beat the butter at medium speed until creamy.

Add 1/3 of the powdered sugar and vanilla and beat on low speed until incorporated. Then add the next 1/3 of the powdered sugar and the milk, 1 T. at a time, until incorporated. Finish mixing in the milk and powdered sugar.

The buttercream should be quite white and fluffy. Add as much powdered sugar as needed, depending the desired consistency and sweetness.

Assembly:
Remove the muffins from the muffin pan after 5 minutes, and let them cool completely on a wire rack.

Put the buttercream in a piping bag fitted with a round tip. Push the icing down to the bottom of the bag, and then twist the bag above the icing to reduce any bubbles. (Before piping the icing onto the cupcake, squirt some back in the bowl, because there might be bubbles and you don’t want to waste a cupcake with ugly icing!)

To ice, squeeze the icing onto the cupcake, starting from the outside and go around and up in a circular motion.

**For the pink and green cupcakes, I used ¾ of the icing for the pink and the other ¼ for the green. To reach the pink color, I used red food coloring until I reached the pink that I wanted. For the green, I used green food coloring, and a couple drops of yellow. I folded the color in with a spatula, so that the icing didn’t get overworked. I used the piping bag fit with the larger round tip for the pink, and then another piping bag fit with a small round tip for the green icing.

TIP: These cupcakes are a perfectly pink color, and would be quite fitting for any girly event: baby shower, bachelorette party, bridal shower, etc. I also used them for a cook-out (co-ed) and they were a huge hit!

Sans Food Coloring (these were for the cookout)